Scrapbook City Shop Online Gallery Classes Newsletter Sign Up Contact Us Card City BlogScrapbook City Blog

Tuesday, 18 March 2008

Layout of the Week

Here is the Layout of the Week! But before I begin can I just ask you a question....do you think the year is flying by too fast also??!! I can't believe we are sitting on the tails of Easter and then shortly after that the end to the first school term. All I can say is no wonder I am exhausted!

But, you know what it really means? In five minutes time (well that is what it will feel like!) we will be getting out those Christmas products and making cards and gifts for Christmas, again!

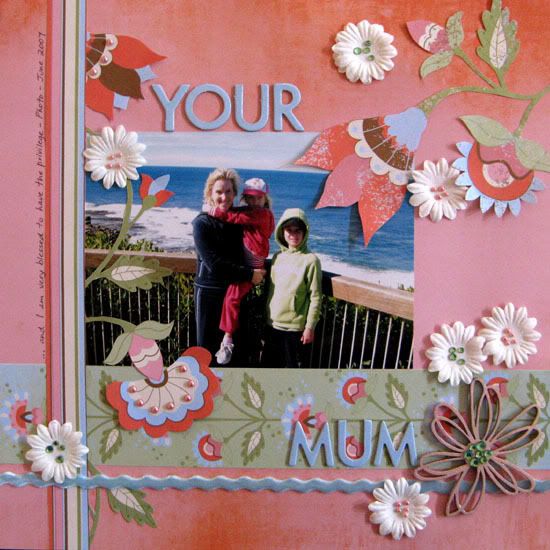
Anyway, back to the Easter talk, have you ever thought of scrapping what Easter means to you? That is what I have done in this layout. For me Easter is enjoying the best Hot Cross Buns I have tasted...my own of course! (and I am sure if you tried one you would agree!!! LOL!!). So enjoy this layout and have a think about what you could scrap for Easter this year that maybe you haven't thought about.


Materials:

1 4x6 portrait photo
Kaiser Craft Sublime paper
Majesty - Cut a rectangle about 5.5" x 7"
Divine - Cut three circles, one 15cm across and two 12cm across
Outrage - Cut a strip 12" x 1.5"
Kaiser gems - Light Green
Bella Chipboard letters - black Kindy Glitz
EK Success corner rounder (for creating the scallop)

Instructions:

1. Place the two smaller circles black and white side up about half way down the page and to the left side with a gap between them.

2. Place the larger circle green side up between and above these smaller circles about 3/4" from the top.

3. place the stripey strip across the bottom of the smaller circles.

4. Scallop the edges of three sides of the green spotty recatangle and trace these edges with Kindy Glitz if desired. Add your 4x6 photo to this piece.

5. Place the matted photo longways on the circles roughly lining up with the larger green circle.

6. Add your title across the top of the photo.

7. Space some of the larger gems around the larger green circle.

Monday, 10 March 2008

Clear Scraps Acrylic Albums

If you have seen the great Clear Scraps acrylic albums in the shop and have been wondering what to do with them check out the gallery to see some done up!

This week the Paper Craft Convention is on at the RNA Showgrounds in Brisbane. The show runs from Friday 14th March to Sunday 16th March. So if you need some inspiration or just have the urge to shop come and check it out! We will be there so if you go make sure you come and say "Hi"!

Our very own Nikala will be teaching a class at the show, a great mini album. You can book for this class on the day and once you book you can purchase your kit from us at Scrapbook City!

Layout of the Week

A new week begins and it is time to show you our layout of the week! This week the layout was created by Michelle, thanks Michelle! (click on the image and it will take you to the shop)


Materials:

Kaiser Craft-
Imagine papers – Suppose, Ponder and Wonder
Wooden Flower
Pink Pearls
Green Rhinestones
3.5cm Cream Flowers

Bella Blue Chipboard Letters
Blue Velvet Ric Rac
Making Memories Specialty Glaze Pink

Instructions:

1. Cut flower from your Suppose patterned paper.

2. Cut green strip from your Wonder patterned paper. Also cut the striped strip that has flowers attached to it. Cut around the flowers while leaving attached to striped strip.

3. Paint your wooden flower with the pink glaze and put aside to dry.

4. Use your piece of Ponder paper as your backing sheet.

5. Attach your green strip to your paper approximately 2” from the bottom of your page.

6. Attach your photo approximately 2” in from the left-hand edge of the page.

7. Attach your striped strip with cut out flowers with the striped strip flush with your photo. Attach some pink pearls on top of the spots on the flowers.

8. Attach a piece of blue velvet ric rac across the page approximately ¼” down from your green strip.

9. Stick down your large flower in the top right hand corner.

10. Stick down the “your” of the title on top of your photo

11. Take six cream flowers and put green rhinestones in the centre of three flowers and pink pearls on the other three. When your wooden flower is dry, stick it down partially on your green strip and partially over the ric rac in the bottom left hand corner. Now you can stick down all of your cream flowers.

12. Stick down the “Mum” of your title next to the wooden flower.

13. Finish with some journaling on the left hand side.

Monday, 3 March 2008

Layout of the Week

First I need to shout out to everyone who can hear me.....we have Bazzill at 69c a sheet this week!! Yes, you heard right, but only until Sunday 9th March, so hurry!!


Check out this great new layout from Tammie. She has used some of the new Kaiser Craft papers and it looks fantastic!


Materials:

12x12’ piece of White Bazzill
12x12’ piece of Red Bazzill
Bella Chipz Alphabet- Red
Chip Chatter Alphabet- White
4 White Large Brads
Foam Tape
Dimensional Magic
Kaisercraft Thrill Seeker Patterned paper range - “Adventure” Blue side – 10" x 8 ½" piece, Striped side- 2" x12" strip
“Explore” Spot side - 3"x6" strip and Letters side – 5"x11" piece with each end torn and a Letters side - 2’x 8’ piece with the top and bottom of strip torn
“Prankster” Words -Various words and/or sayings cut out


Directions:

1. Cut out chosen words from the Prankster paper and Adhere foam tape to the back of each word. Coat each word with dimensional magic and put aside to dry.

2. Mount each photo onto red cardstock leaving a small border mount the chosen verse onto red cardstock leaving a small border, place a white Brad in each corner and adhere foam tape to the back of the cardstock.

3. Adhere the cut out piece of Adventure blue dot to the paper 1’ from the top of the page and ½’ from the right hand edge of the page.

4. Adhere the Explore Letter sided cut out piece ½’ from the bottom of the page slightly off centre to the left.

5. Adhere the Explore blue and red Dot cut out piece ½’ inch from the left hand edge of the page and meeting the top of the white cardstock.

6. Adhere the Adventure strip cut out strip in the middle of the dot paper from the top of the page to the bottom of the page.

7. Arrange the red letters of your title on the blue dot paper ½’ from the top of the paper and place the letters torn strip about a ½’ below the red letters across for the spotty vertical strip to the edge of the dark blue spotty patterned paper.

8. Place the white chip chatter lettering across the letter patterned paper strip and adhere.

9. Place red bella chipz numbers in top left hand corner of each photo as appropriate.

10.Adhere the photos across the middle of the layout.

11. Adhere the words down the vertical stripy patterned paper strip.

12. Doodle a stitching line around the outside of the patterned paper onto the white cardstock.


Great layout Tammie! Check out the store here for an easy list of materials.


Saturday, 1 March 2008

Lots Happening

Well another week has slipped by and lots has been happening! Last week saw our first Cyber Crop for the year happen and as usual a lot of fun was had by all. We had some great challenges set by Carole, Michelle and Ang and plenty of high quality work entered in. The decision making process was tough, but finally a winner for each challenge was decided and we would love to share their work with you.


Ang's Sketch Challenge - Niss

Carole's "Red" Challenge - Brenda

Michelle's "Use Your Name" Challenge - Felicity


If you missed out on the Cyber Crop this time, make sure to keep a look out for the next one. They are lots of fun and give plenty of inspriration for scrapping too!

Lots of new things have come into the store this week, including new Kaiser Craft products.
Kaiser Craft is bringing out many new things and we just can't get enough of them! They are relatively inexpensive and very versatile. This week we saw three new paper lines, including a great boy collection, new mini albums, pearls in new colours and also bling words! Plenty of great new products to inspire your next project, and to show you how great they look here is a "Me" mini album put together by Michelle.

While we are talking about Michelle a huge congratulations is sent her way on the announcement of her inclusion in the new For Keeps Design Team! Fantastic news Michelle we all look forward to seeing more of your work!

Photography Tip: When taking photos of people zoom in on them as much as possible to fill the frame. This helps to keep the focus on them and not what is in the background. Try using portrait mode or aperture priority (with a small number eg 5.6 or lower) to help blur the background which also helps make your subjects stand out.